自定义View(一)
- 继承View类的自定义控件,核心步骤分别为尺寸测量
onMeasure与绘制onDraw。因为View类型的子类也是视图树的叶子节点,因此它只负责绘制好自身的内容即可,而这两步就是完成它职责的所有工作。
自定义View实践
这里我们来简单的实现一个显示图片的View:
步骤一:自定义View的属性
- 在
values/attr.xml中定义我们自定义View所需要的属性,这里我们给自定义View一个名为src的整型属性,通过这个属性我们可以为我们的自定义View设置图片的资源id,attr.xml内容如下:
<?xml version="1.0" encoding="utf-8"?>
<resources>
    <declare-styleable name="SimpleImageView">
        <attr name="src" format="integer"/>
    </declare-styleable>
</resources>
步骤二:核心代码实现
- 具体代码如下:
public class SimpleImageView extends View{

    /**
     * 画笔
     */
    private Paint mBitmapPaint;

    /**
     * 图片
     */
    private Drawable mDrawable;

    /**
     * View的宽度
     */
    private int mWidth;

    /**
     * View的高度
     */
    private int mHeight;

    public SimpleImageView(Context context) {
        super(context,null);
    }

    public SimpleImageView(Context context, AttributeSet attrs) {
        super(context, attrs);
        //根据属性初始化
        initAttrs(attrs);
        //初始化画笔
        mBitmapPaint = new Paint();
        mBitmapPaint.setAntiAlias(true);
    }

    private void initAttrs(AttributeSet attrs){
        if (attrs != null){
            TypedArray array = null;
            try {
                array = getContext().obtainStyledAttributes(attrs, R.styleable.SimpleImageView);
                mDrawable = array.getDrawable(R.styleable.SimpleImageView_src);
                //测量Drawable对象的宽、高
                measureDrawable();
            }finally {
                if (array != null){
                    array.recycle();
                }
            }
        }
    }

    private void measureDrawable(){
        if (mDrawable == null){
            throw new RuntimeException("drawable 不能为空!");
        }
        mWidth = mDrawable.getIntrinsicWidth();
        mHeight = mDrawable.getIntrinsicHeight();
    }

    @Override
    protected void onMeasure(int widthMeasureSpec, int heightMeasureSpec) {
        setMeasuredDimension(mWidth,mHeight);
    }

    @Override
    protected void onDraw(Canvas canvas) {
        if (mDrawable == null){
            return;
        }

        //绘制图片
        canvas.drawBitmap(ImageUtils.drawableToBitmap(mDrawable),getLeft(),getTop(),mBitmapPaint);
    }
}
这里我们创建了一个继承自View的SimpleImageView类,在构造函数中我们会获取该控件的属性,并且初始化要绘制的图片和画笔。
在initAttrs函数中,我们首先读取SimpleImageView的属性集TypedArray,再从该对象中读取SimpleImageView_src属性值,该属性是一个drawable的资源id值,然后我们根据这个id从该TypedArray对象中获取该id对应的drawable;最后measureDrawable函数测量该图片mDrawable的大小。
我们在SimpleImageView中定义了两个字段mWidth、mHeight分别表示SimpleImageView视图的宽度和高度。从measureDrawable函数我们可以看出,我们通过在xml文件中指定资源id对应的drawable得到图片的高度和宽度,并把它们当做SimpleImageView的宽和高,也就是说图片有多大,SimpleImageView就有多大。当SimpleImageView被加载时,首先会调用onMeasure函数测量SimpleImageView的大小,然后再将图片绘制出来。
步骤三:使用SimpleImageView
<?xml version="1.0" encoding="utf-8"?>
<LinearLayout xmlns:android="http://schemas.android.com/apk/res/android"
    xmlns:img="http://schemas.android.com/apk/res-auto"
    android:orientation="vertical"
    android:layout_width="match_parent"
    android:layout_height="match_parent">

    <blog.donnie.demoprojects.ui.widget.SimpleImageView
        android:layout_width="wrap_content"
        android:layout_height="wrap_content"
        img:src="@mipmap/ic_launcher"
        />

    <!--
    在使用自定义属性时,我们需要将该属性所在的命名空间引入到xml中,
	命名空间实际上就是该工程的应用包名。因为自定义的属性集最终会编译为R类,
	R类的完整路径是应用的包名.R,格式如下:
    xmlns:名字="http://schemas.android.com/apk/res/应用包名"
    其中res-auto的效果是一样的,系统会自动帮我们导应用包名。
    -->

</LinearLayout>
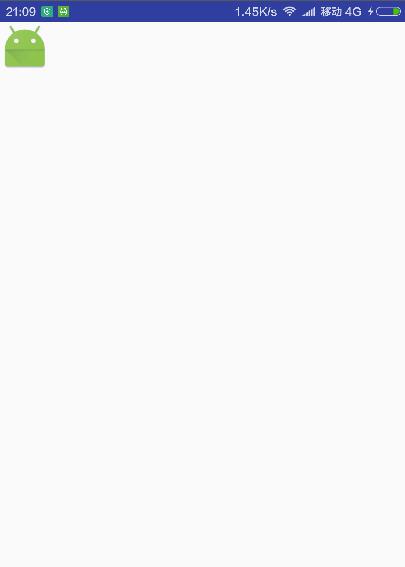
运行示例代码,效果如下图:
总结
- 自定义属性,在
values/attrs.xml中定义属性集; - 继承自
View创建自定义控件; - 在代码中读取自定义属性,初始化视图;
- 测量视图大小;
- 绘制视图内容;
- 在xml中引入命名控件,设置属性。